The Gas Water Heater Timer “Smart Device” comes fully-assembled and can be installed in as little as 10 minutes by an average home owner. No tools are required!
Installing the Gas Water Heater Timer is as easy as removing your gas control valve knob and attaching the device.
How to Install the Gas Water Heater Timer in 3 Easy Steps
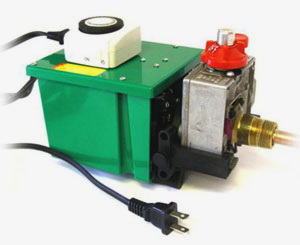
Installation Step 1
Read the instructions fully before installing!
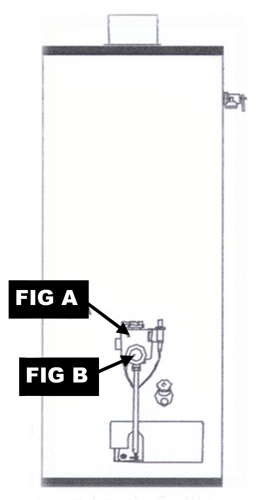
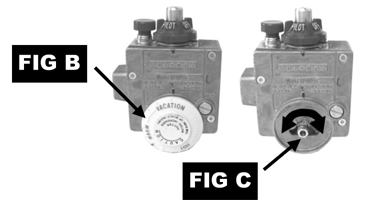
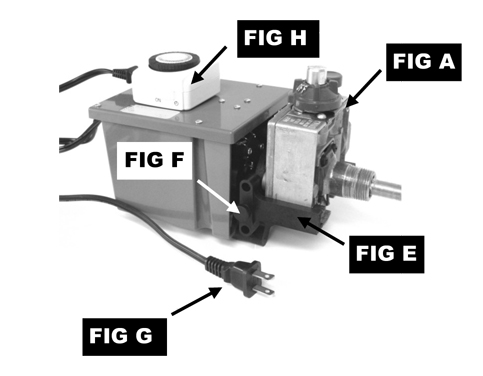
Locate the “gas control valve” (Fig A) in the lower center of your gas hot water heater. Turn the “gas control knob” (Fig B) located on the face of your water heater gas control valve to the “VACATION” or “PILOT LIGHTING” setting until it stops.
Remove the “control knob” from the face of the gas control valve (Fig C), by pulling on it. Knobs may look different and vary in color, depending on your gas control valve.
Installation Step 2
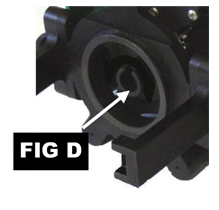
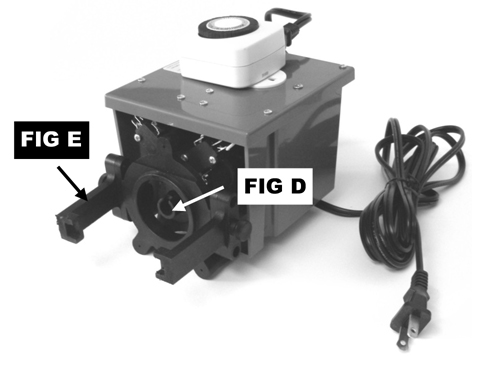
Align the shaft’s notch on the gas control valve (Fig C) to match the vertical notch (Fig D) on the Gas Water Heater Timer. A 1/8” turn to the left or right should provide a perfect alignment so that the notch on the Gas Water Heater Timer fits over the shaft’s notch on the gas control valve.
DO NOT ATTEMPT TO TURN THE NOTCH (Fig D) ON THE GAS WATER HEATER TIMER — This may void the warranty. (Notches and shafts may look slightly different depending on the gas control valve you have.
Installation Step 3
Seat the Gas Water Heater Timer firmly onto the face of the gas control valve and install the “universal mounting bracket” (Fig E) on the right side of the gas control valve.
Note: The universal mounting bracket has 3 holes. If the hole you choose does not fit your gas valve, simply choose the hole that best suits your valve.
Insert and tighten the “thumbscrew” (Fig F) on the right side of the mounting bracket.
Note: Some water heaters have an igniter on the right side of the gas valve. You may have to unclip the igniter and place it on top of your gas valve. Don’t worry… it will still function!
Install the remaining mounting bracket on the left side in the same way. Tighten the “thumbscrew” (Fig F) on the left side of the mounting bracket. Set the 24 hour timer (Fig H) for the times you wish your water heater to operate… and plug the AC cord (Fig G) into any 110v AC outlet.
Optional: Use any Home Automation Control of your choice or a 7 day timer. Make sure to use an Appliance Module when adapting to home automation.
Temperature settings may vary depending on the age of the water heater and may require adjustments later.
You’re now on the road to saving money and energy!
Any Home Automation Control of your choice can replace the 24 hour timer included with your Gas Water Heater Timer.
Control your water heater from anywhere in the world with a land line, smart phone tablet or computer.
A smart device for second homeowners and business owners.


